
With the bells a ringin’ and the children singin’, it’s time to talk even more decor for the winter and holiday season.
My tree is up, the twinkly lights are in the window and a pot of tea is steeping. It’s safe to say I’m ready to bundle up, throw on some HGTV and let out a relaxing sigh.
But there’s no time like the present to get crafting and put my spin on an alternative wreath.
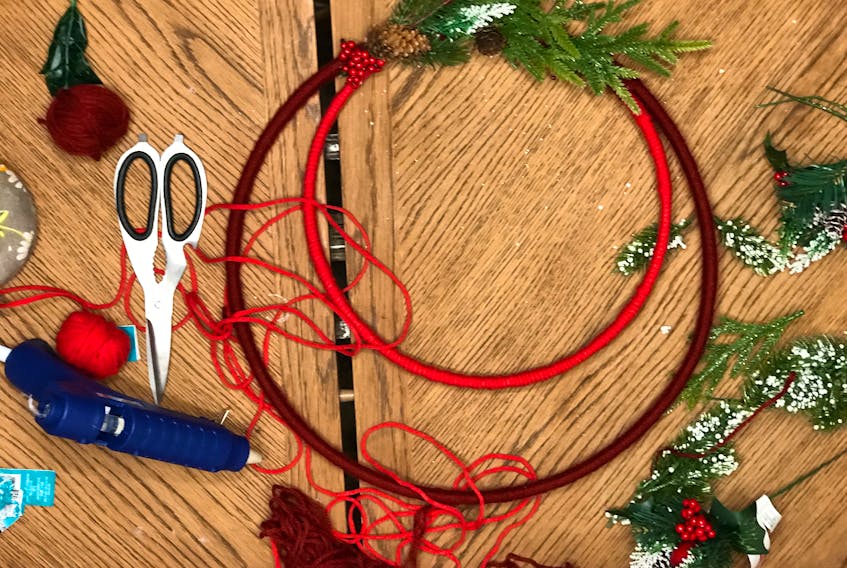
While scrolling online, I found a decor idea that I loved – instead of a traditional wreath, use embroidery hoops of different sizes, wrap them in cord of string and then add greenery.
What’s better, I got to craft this with my momma.
What you’ll need:
- Yarn/cord/string in two different colours
- Embroidery hoops of two different sizes (we used 10-inch and 14-inch)
- Faux winter greenery – pine cones, berries, evergreens of your choosing.
Instructions:
1. Separate embroidery hoops so you’re using the inside hoops for the wreath rather than those with the clasp.
2. Line up hoops so the small one sits inside of the larger one. The edges of the small hoop should be flush with the larger one.
3. Glue where the hoops touch in order to secure them together.
4. Using one of the colours of yarn, put a small part of glue on the inside hoop and attach an end of yarn to it. Start wrapping the smaller hoop in yarn and go all the way around until you meet where the edges of the hoops meet (don’t worry, you won’t be left with a blank spot). Attach the other end of the that string of yarn to the hoop so it doesn’t unwind.
5. Taking the other colour, attach an end to the larger hoop. Start wrapping around where the two hoops meet. Once that area is covered, start wrapping the larger hoop. Follow the same process as in step four.
6. Once the hoops are wrapped, start laying greenery along one bottom side of the hoop. You could put greenery all the way around, or in a small cluster. Don’t glue the greenery down until you’re happy with how it looks.
What if you’re looking for a certain leaf and you’re not sure what it is? Well, maybe these descriptors will help:
Eucalyptus: On a stem, leaves are circular with stem seaming to go through the middle of the leaves
Cedar: Lays flat, with small branches. Think of the bottom of a frog’s foot - there’s the place where each “toe” meets, that would be the main part of the leaf and then from the main part the branch off.
Pine: Long, thin needles, that branch out and, if laid flat, looks like a fan.
Juniper: if you were to draw a shape around the whole main stem and the needles, you’d find it looks like an oval. Needles are clustered on branches.
Magnolia: Thick, glossy leaf with a line down the centre. Ovular in shape.
Spruce: Short needles that stick out from each side of the stem/branch.
Happy holly jolly homebodies.
Millicent McKay is a millennial homemaker, tea drinker, journalist and blogger for www.modernmillee.com. For more check out her weekly blog posts and follow her on Instagram - https://www.instagram.com/modernmillee/